Blog
August 14, 2026
·9 min readHow to Scan, Export and Publish a Luma AI 3D Model Online

Otuokon Nsikak
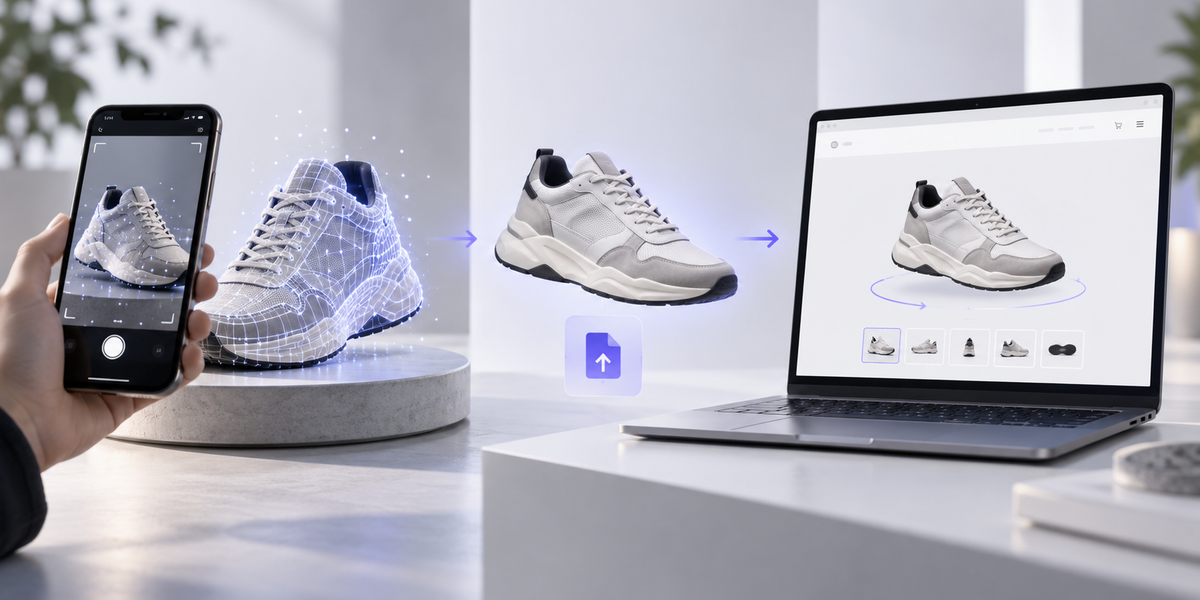
Luma 3D Capture can turn a real object into a digital 3D asset with a phone. Capturing the object is only the first step.
To use that scan on a product page, portfolio, or online catalogue, you still need to:
export the right file
prepare it for web performance
publish it through a browser-based 3D viewer
This guide covers that full path: scan in Luma, export, prepare, then publish an interactive 3D or AR experience with SwiftXR.
Luma AI is an independent product from Luma AI, Inc. SwiftXR is the publishing layer that turns the finished file into something customers can open, rotate, and place in AR without an app.
What you will create
By the end of this workflow you should have:
- a Luma scan of a real object
- a web-ready model file
- a published interactive 3D experience
- optional AR viewing on supported phones
- a shareable link or embed for your website
If possible, place a live example at the top of the published page so readers can see the outcome before the steps.
What you need before starting
- A phone that can run Luma 3D Capture
- The Luma 3D Capture app
- A suitable object that does not move during capture
- Even lighting
- A SwiftXR account for publishing
Note on devices: Availability and supported phones change. Check the current App Store or Luma product page before you start. If you are on Android and Luma is not available for your device, tools such as KIRI Engine can produce a model that still publishes through the same SwiftXR path.
Step 1: Choose an object that will scan cleanly
Luma works best when the subject is stable and readable.
Good candidates
- solid products with clear shape
- matte or lightly textured surfaces
- objects you can walk around fully
- items that stay still for the whole capture
Harder candidates
- mirrors and highly reflective products
- clear glass or transparent packaging
- thin wires, hair, or mesh
- soft fabric that shifts while you move
- objects that people or pets walk through during capture
If the product is reflective or transparent, expect more cleanup work after export, or consider a different capture method.
Step 2: Scan the object in Luma 3D Capture
Open Luma 3D Capture and start a new capture.
Frame the object tightly so the subject fills most of the view.
Use even lighting. Avoid harsh shadows and mixed light sources.
Move slowly around the object in overlapping loops.
Capture from multiple heights: low, mid, and high.
Cover the top and base where possible.
Keep the object in frame the whole time.
Let the capture process fully before judging quality.
Practical tips
- Do not rush. Incomplete orbits are the most common cause of holes.
- Keep your movement smooth. Sudden jerks create blur and gaps.
- If one side looks weak after processing, reshoot with better coverage on that side.
- Name the capture clearly so you can find it later.
This section should include screenshots of the Luma capture interface in the published version of the article.
Step 3: Review the scan before export
Do not export the first result blindly.
Check for:
- missing faces or holes
- stretched or blurry textures
- floating fragments around the object
- wrong orientation
- background geometry you do not want
If the scan is incomplete, recapture. Fixing a weak capture later costs more time than doing one clean pass.
Step 4: Export the file for web use
Export options inside Luma can change by version and plan. Open the current export menu in the app and confirm what is available on your account.
For website publishing, prioritise a format that works well in browser viewers.
General guidance
- GLB is usually the best option for web and AR when available. It packages geometry and textures in one file and loads cleanly in most web viewers.
- OBJ is useful if you need to clean or edit the model in Blender or another 3D tool first.
- Gaussian splat / PLY-style exports can look highly realistic, but only use them if your publishing path supports that format.
- Printing formats such as STL are for physical output, not product-page viewing.
For SwiftXR publishing: export GLB when the option is available. If Luma only gives you another mesh format, convert or clean it in a 3D tool, then export GLB before upload.
Do not treat any format list as permanent. Verify the live export panel before you write internal SOPs or train a team on one fixed path.
Step 5: Prepare the model for the web
A raw scan is rarely website-ready.
Before upload:
Remove unwanted background geometry.
Check scale. A product that is the wrong size will fail in AR.
Confirm orientation so the product sits upright.
Reduce unnecessary density if the file is heavy.
Compress oversized textures.
Aim for a practical web weight. As a working target, keep many product models under 15MB for smoother mobile loading. Larger files can still work on desktop, but they create friction on phones.
If you need a deeper cleanup pass, edit in Blender or another tool, then export a clean GLB.
Related reading:
3D Product Modeling for Ecommerce: How to Prepare Web-Ready Assets
GLB vs glTF for Ecommerce: A 3D Asset Handoff Guide
Step 6: Publish the scan with SwiftXR
This is the step that turns a file into a customer experience.
Create a new project in SwiftXR.
Upload your GLB.
Set the opening camera so the product reads clearly on first load.
Adjust lighting and background if needed.
Enable AR if you want shoppers to place the product in their space.
Publish.
Copy the share link or embed code.
Place it on your product page, portfolio page, or campaign page.
No custom development is required for the basic publish path. The experience opens in the browser on desktop and mobile.
If you are embedding on a storefront, keep the viewer inside the existing product page so the path to purchase stays intact.
Step 7: Test on a real phone
Before you call the project done, open the published link on a phone and check:
- load speed
- rotation and zoom
- correct scale in AR
- whether the product sits on the floor or table as expected
- whether materials still look acceptable on a smaller screen
A scan that looks fine on desktop can still fail the mobile test. Fix issues before wider rollout.
Troubleshooting
Missing sections in the model
You likely under-covered that side during capture. Rescan with slower, fuller orbits.
Blurry textures
Improve lighting, hold the phone steadier, and move more slowly.
Reflective products look broken
Mirrors, gloss packaging, and polished metal are difficult for phone capture. Matte spray, polarised light setups, or a different capture method may be required.
Transparent objects fail
Clear glass and transparent plastics often reconstruct poorly. Consider professional capture or a modelled asset instead.
File is too large and loads slowly
Reduce texture resolution, clean unused geometry, and re-export a leaner GLB.
Product appears sideways or upside down
Fix orientation before publish. Do not leave that correction to the shopper.
AR scale feels wrong
Recheck real-world dimensions during preparation. Wrong scale is one of the fastest ways to lose trust.
The scan looks good in Luma but weak on the website
The issue is usually export choice, file weight, or missing cleanup, not the capture alone.
What this workflow is good for
- product pages that need real-object fidelity
- portfolios and catalogues built from physical samples
- prototypes and early commercial previews
- objects that are faster to scan than to model from scratch
What this workflow is not
- a guarantee of production-perfect topology
- a replacement for every professional 3D pipeline
- a fit-prediction or virtual try-on system by itself
- a one-click solution for every reflective or transparent product
Use Luma to capture. Use cleanup where needed. Use SwiftXR to publish.
Why publishing matters as much as scanning
A Luma scan sitting in an app or folder does not help a buyer decide.
The commercial value appears when someone can:
- open the model in a browser
- inspect it from every side
- place it in their space with AR
- continue toward purchase or enquiry
That is the gap this workflow closes.
FAQ
Is Luma 3D Capture available on Android?
Check the current Luma product listing for your region and device. Support can change. If Luma is not available on your phone, alternative scanners can still feed the same SwiftXR publish path.
Can Luma export GLB?
Export options depend on the current app and plan. Open the export menu and confirm. For web publishing, GLB is the preferred target format when available.
Can I put a Luma scan on Shopify, Wix, or WooCommerce?
Yes. Publish in SwiftXR, then embed the experience on the product page through the supported storefront workflow or embed code.
Do shoppers need an app to view it?
No. SwiftXR experiences are designed to open in the browser.
Can a Luma scan be used in AR?
Yes, once it is published through a web AR-capable viewer and the scale is set correctly.
Should I publish the raw scan immediately?
Only if quality, orientation, scale, and file weight already look solid. Most scans benefit from a short review pass.
Is this the same as AI image-to-3D?
No. Luma 3D Capture rebuilds a real object from capture data. Image-to-3D generates a model from photos or prompts. Different inputs, different expectations.
From Luma capture to a live product experience
The useful workflow is not “scan something impressive.”
It is:
capture cleanly
export the right file
prepare for the web
publish where customers can use it
Luma handles the capture.
SwiftXR handles the publish step.
If you already have a Luma scan, the next move is simple: get it into a browser-based experience your audience can open today.