Blog
August 24, 2026
·6 min readHow to Publish Daz3D Models Online in 3D and AR (And Finally Let People See Your Work)

Otuokon Nsikak
You spent weeks on it.
The lighting is right. The textures are dialled in. The character looks exactly the way you imagined when you started. And then you save the file, close Daz Studio, and the work disappears into a folder on your hard drive where nobody will ever see it.
That is the Daz creator problem nobody talks about. The software is extraordinary for building. It is not majorly for sharing. And a model that nobody can open, interact with, or experience in AR is not finished; it is just stored.
This guide closes that gap. By the end of it, your Daz model will be live on the web as an interactive 3D viewer and an AR experience anyone can open from a link. No app download, no developer, no complicated pipeline.
Just your work, finally out in the world.
Why Most Daz Models Never Get Seen
Daz Studio is built for creation, not distribution. The files it produces are heavy, proprietary, and impossible to open without the software. That means every model you build lives in a closed environment, impressive inside the viewport, invisible everywhere else.
The creators who break out of that cycle are not necessarily better artists. They are the ones who figured out the publishing step that most Daz tutorials skip entirely.
That step is converting and publishing your model as a GLB, a web-ready 3D format, and deploying it through a platform that turns it into something people can actually interact with.
SwiftXR is that platform. Once your model is published there, it becomes a live browser experience: shareable, embeddable, viewable in AR, no friction for the person opening it.
What This Unlocks for Daz Creators
Before getting into the steps, here is what becomes possible once your models are live:
Character showcases that clients and commissioners can rotate and inspect in detail from any device.
Clothing and wearable presentations where buyers can see the piece from every angle and place it in AR before deciding.
Portfolio experiences that feel interactive and immersive rather than a gallery of flat renders.
Commercial web previews for models you sell or license, giving buyers a real sense of what they are purchasing.
AR try-on and placement demos for stylised assets, environments, and product-adjacent work.
The difference between a render and a published 3D experience is the difference between showing someone a photograph of a place and letting them walk through it.
What You Need
Before starting, make sure you have:
- Daz Studio installed with your scene ready
- The Daz to Blender Bridge plugin
- Blender (free)
- A SwiftXR account (free to start)
Blender handles the conversion and cleanup. SwiftXR handles the publishing and distribution. Together they form the pipeline most Daz creators are missing.
Step 1: Prepare Your Daz Scene
Open your scene in Daz Studio and make sure everything you want in the final experience is visible and selected.
This sounds obvious, but it is the most common source of broken exports. If it is not selected, it will not transfer. Do a final check before moving on , catching a missing prop or texture here saves you from discovering it after publishing.
Step 2: Reduce the Model Weight
Daz models are built for rendering, not the web. They carry far more geometry than a browser needs, and that weight will make your published experience slow and heavy.
Before exporting, select the model and reduce the resolution:
- Resolution: Base
- Subdivision: 0
This single step is the difference between a 3D viewer that loads in two seconds and one that takes fifteen. Lighter models hold attention. Heavy ones lose it.
Step 3: Transfer to Blender via the Bridge
Use the Daz to Blender Bridge to move the scene into Blender.
Once it opens, check three things before touching anything else:
- Does the model look right?
- Are the textures loading correctly?
- Are any parts missing?
Fixing issues here takes minutes. Fixing them after publishing takes much longer. Do not skip the check.
Step 4: Clean the Asset
This is the step most tutorials rush through and the one that determines the quality of the final experience.
In Blender:
- Delete anything that will not be visible in the published experience: hidden geometry, unused objects, duplicate meshes
- Pack all textures into the file so nothing goes missing on upload
- Check transparent materials carefully; eyes, eyelashes, hair, and sheer fabrics are the most common problem areas and need specific material settings to render correctly in a web viewer
A clean file produces a stable, good-looking live experience. A messy file produces glitches that undermine the work you put into the original model.
Step 5: Export as GLB
GLB is the format the web uses for 3D. It packages geometry, textures, and materials into a single file that browsers can load quickly and AR platforms can read reliably.
Export your cleaned model as GLB and keep an eye on file size. Under 15MB loads well on most connections. Over 50MB starts to create real friction, especially on mobile where most people will be opening your link.
If the file is too heavy, go back and simplify further. The goal is the best quality at the lowest weight, not the highest fidelity regardless of size.
Step 6: Publish with SwiftXR
This is the step that turns a file into an experience.
In SwiftXR:
- Create a new project
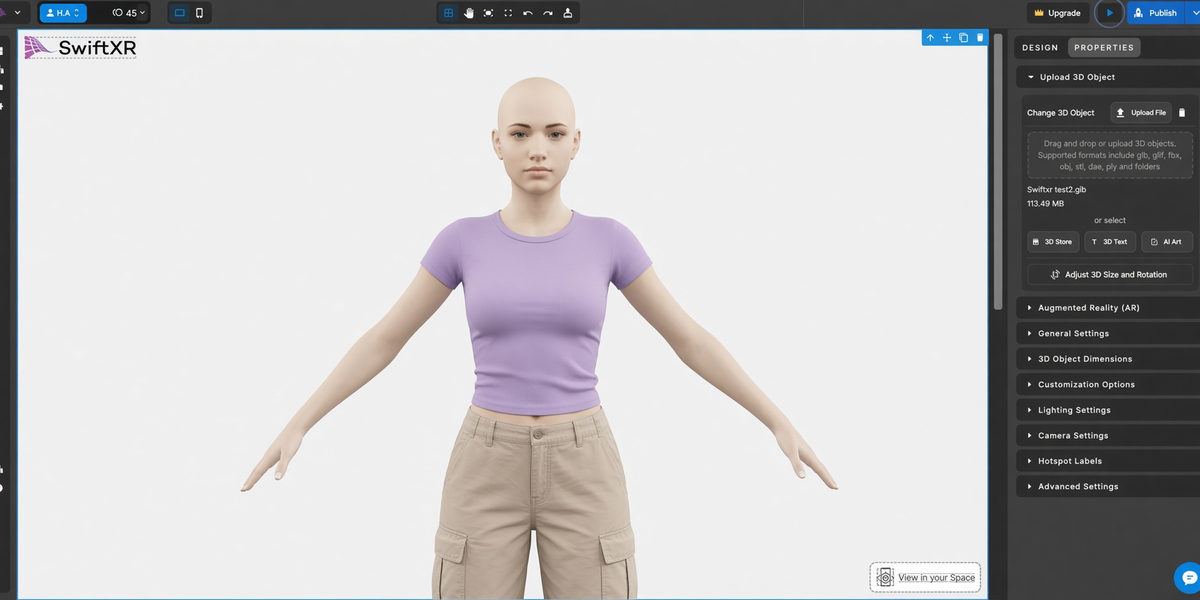
- Upload your GLB
- Configure the 3D viewer, lighting, background, initial camera angle
- Enable AR if you want people to be able to place the model in their real space
- Publish
Once live, your model can be opened in any browser, shared as a direct link, embedded on a website or portfolio, and viewed in AR on any modern smartphone without an app download.
The whole setup takes less time than a single render.
What Changes When Your Work Is Finally Live
There is a specific feeling that happens the first time you send someone a link, and they open your model, rotate it, and place it in their room using AR.
It is not just that they can see it. It is that they can be inside it. The work stops being a file you made and becomes something they experienced.
That shift matters commercially too. Clients who can inspect a character in 3D before commissioning more work buy with more confidence. Buyers who can see a wearable or prop in AR before purchasing return it less often. Collaborators who can open a shared link and rotate the model in real time give better feedback faster.
Daz Studio is where the model is built. SwiftXR is where it finally reaches people.
If your best work is still sitting in a folder, it is not finished yet.
Start free with SwiftXR and publish your first Daz model today
No credit card. No developer. Your model, live in 3D and AR, before the end of today.