Blog
September 2, 2026
·5 min readThe Fastest Way to Convert an Image to a 3D Model

Otuokon Nsikak
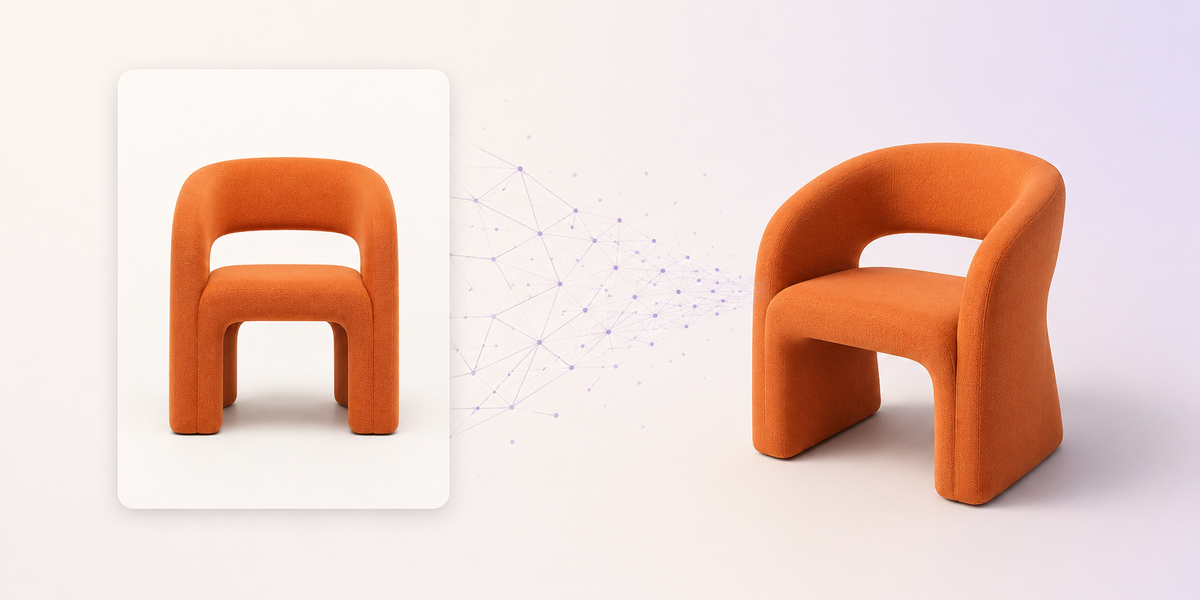
You do not need a modelling degree to get a 3D product on the web.
You need a clear photo, a tool that turns that photo into geometry, and a place to publish it so someone else can open it without your software. Most “image to 3D” guides stop at the download. That is only half the job. A GLB sitting in a folder is still not a product page.
This is the fast path: one image in, a usable 3D model out, then live in the browser. SwiftXR is built for that full sequence.
What “fastest” actually means
Speed is not only generation time. Speed is time from photo to something a customer can rotate on a phone.
Three clocks matter:
Capture — one clear image versus a full photogrammetry shoot
Generation — AI mesh from that image
Publish — link or embed on a site, with AR if you need it
AI image-to-3D wins the first two. A no-code publisher wins the third. Together they beat “hire an artist and wait two weeks” for early product pages, concepts, and catalog pilots.
When a single image is enough
Use image-to-3D when you need a first interactive view this afternoon, the product is a single object with a clear silhouette, you are testing 3D on a few SKUs before a full scan pipeline, or marketing needs something explorable, not CAD-perfect.
Use multi-view capture, Gaussian Splatting, or manual modelling when the back of the product must be exact, materials and fine geometry drive the sale, or the asset will live in a long configurator or manufacturing pipeline.
Fast is not the same as final forever. Fast is the shortest honest path to a live experience.
The fastest workflow (image → 3D → page)
Step 1: Get one strong image
Product centred. Even light. Clean background. Sharp focus on the full object.
Skip heavy shadows, extreme angles, and busy scenes. The AI has to invent the sides it cannot see. A clean front three-quarter shot gives it the best chance.
Step 2: Convert the image inside SwiftXR
Sign in and create a project. Add a 3D or AR component. Open the AI image-to-3D path in properties. Upload the image, name the model, generate. Drop the result onto the canvas when it is ready.
That is the core conversion. No separate desktop suite required for a first pass.
Step 3: Check the model like a shopper
Orbit it. Look for broken edges, melted details, and weak backsides. If the silhouette is right and the product is recognisable, you are ready to publish. If it is not, try a cleaner photo or a different angle before you rebuild the whole pipeline.
Step 4: Publish
Publish the project in SwiftXR. Copy the share link or embed code. Put it on Shopify, WooCommerce, Wix, Squarespace, Webflow, or any page that accepts an embed.
That last step is what most image-to-3D tools leave out. SwiftXR is the channel that turns the generated model into a live product experience.
Why this beats the slow routes
AI image-to-3D can get you a first model in minutes. That is the right tool for speed, pilots, and simple products.
Multi-photo scanning or photogrammetry usually takes hours, but it earns its place when you need higher fidelity on a real object.
Manual modelling takes days to weeks. Use it when you need precision, variants, and assets built to last.
If the goal is “on the product page today,” AI image-to-3D plus publish is the short line. If the goal is a permanent hero asset for a luxury catalog, invest in better capture or modelling after the pilot proves demand.
Make the output web-ready
Generation is not the finish line.
Keep the file practical for phones. Set a clear default camera in the viewer. Enable AR when scale in the room matters. Test on mobile before you call it done.
A fast model that stalls on a mid-range phone is not fast for the customer.
Common mistakes that waste the speed advantage
Using a dark, cluttered, or cropped photo. Expecting the hidden side of the product to be perfect from one frame. Stopping at download and never embedding. Putting a rough AI mesh on a premium product page with no QA. Skipping AR when the real question is whether it will fit the space.
FAQ
Is AI image-to-3D accurate enough for ecommerce?
For many simple products and early tests, yes. For high-stakes materials, exact dimensions, or complex backsides, treat it as a first version and upgrade capture later.
Do I need Blender?
Not for the fast path. Generate in SwiftXR, publish, embed. Use Blender when you need deeper cleanup or a long-term mesh pipeline.
Can I use the model in AR?
Yes. Publish with AR enabled and test on a real phone. That is often the moment the product stops being abstract.
What if the first generation looks wrong?
Change the source image first. Better light and a cleaner background usually help more than more settings.
The real finish line
The fastest conversion is not the one that creates a file first. It is the one that creates a public experience first.
Upload the image. Generate the model. Publish it. Let someone open it on their phone without asking you for software, a Drive folder, or a meeting.
That is the difference between “we tried AI 3D” and “the product page can finally show the product.”
Start free with SwiftXR, convert your first image to 3D, and put it live before the day ends.